
 TixFin
Parking
Create parking zones for an event and assign vehicles to them
2 min read
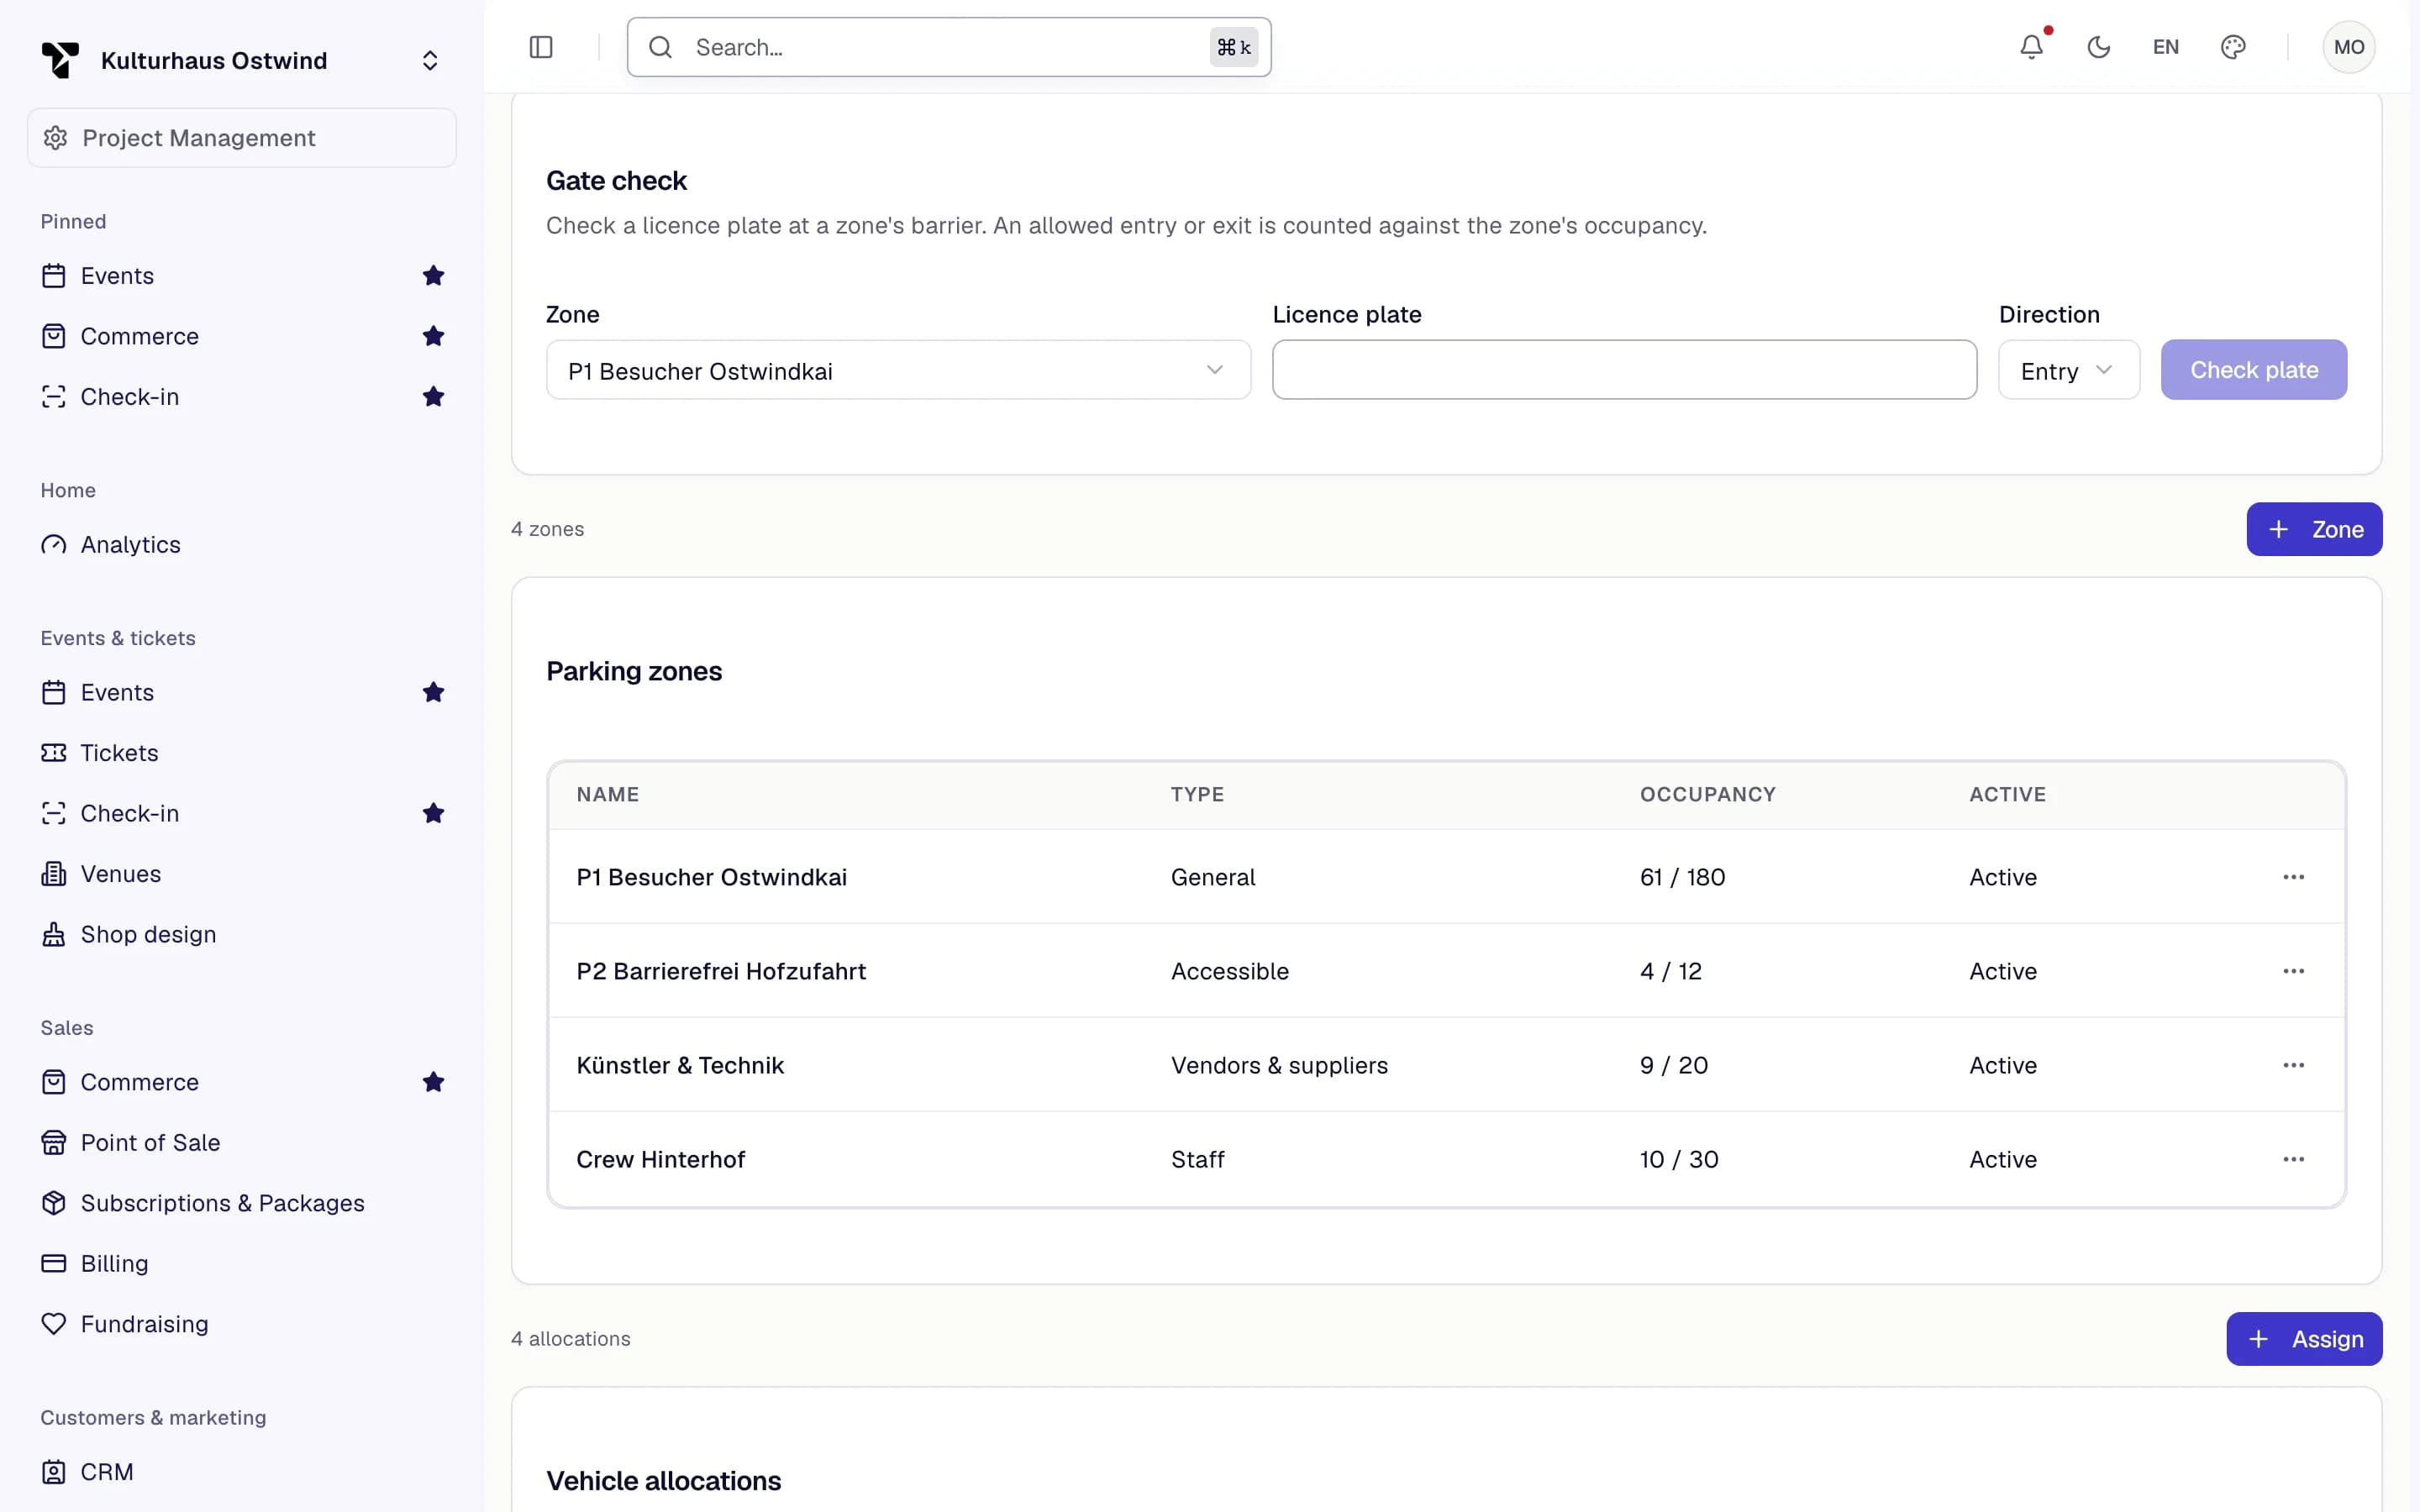
Parking zones are the car parks of your event. Assign vehicles by licence plate, also for suppliers, crew or artists who hold no ticket.
Where: Operations → Crew Ops → Guests & on-site → Parking. Pick the event at the top. Who can do this: members whose role includes the parking permissions
Create a parking zone
Click Zone.
Enter the Name (for example "North car park"), choose the Type (
GENERAL, VIP, VENDOR, STAFF or ACCESSIBLE) and the Capacity.Leave Active on and click Save.
Assign a vehicle
Under Vehicle allocations, click Assign.
Choose the Zone, enter the License plate and, optionally, the Vehicle type.
Switch on Multiple entry if the vehicle may leave and come back. Click Save.
To change a zone, choose Edit zone in its row's ⋯ menu.
Check a plate at the gate
Under Gate check, choose the Zone, enter the Licence plate and the Direction (Entry or Exit).
Click Check plate. TixFin answers Allowed or Refused with the reason, for example a plate with no allocation or a zone that is full.
An allowed entry or exit counts against the zone's occupancy. Checking a plate needs the parking scan permission.
- Zone
- Assign
- Licence plate
- Check plate
- Occupancy
The cards at the top show the number of Zones, the Total occupancy against the Capacity, and the number of Allocations. Each zone shows its own Occupancy.
Common problems
- "No event selected". Pick the event at the top of the page.
- The Parking tab is missing. See Why a module is missing.